For a small business, connecting with the people who sign up on your website is a key part of establishing a successful working relationship. You want to make sure they’re able to get the most out of what you’re offering, and sending them emails with how-tos, tips, and suggestions is an effective way to do that.

Mixmax can power your customizable and personalized onboarding emails to help you start a dialogue with your new users. All it takes is setting up an integration. In this post, I’ll guide you through the process of adding a user to your onboarding sequence via the Mixmax API.
Get set up with a Mixmax account
When someone signs up on your website, we’ll send their contact info to the Mixmax “add recipients to a sequence” endpoint and add them to your onboarding sequence. In order to do this, you’ll need to have a Mixmax Small Business Plan. If you already have one, great! If not, you can sign up here.
Create your onboarding sequence
Step one is to put together your onboarding sequence in the Sequences section of the Mixmax dashboard. Using a Mixmax Sequence provides you with many tools to make your emails more engaging by including polls, yes/no questions, embedded videos or gifs, or tools to allow your users to book time on your sales team’s calendar directly.
At a basic level, your onboarding sequence should consist of a series of messages spaced out over the course of a week or two. It should welcome your users to your service and provide personalized tips to help them understand your value proposition and learn how to quickly get up to speed with what you can provide them.
One thing to remember is that the users who will be receiving this sequence are likely to be brand-new to you and you won’t know much about them like their full names, phone numbers, etc. so you won’t be able to include many in your sequence messages.
You can learn more about creating sequences from our success articles. Once it’s done (don’t worry, you can always update it later), let’s get it wired up to your signup system.
Get set up with the Mixmax API
Once you’ve got your sequence ready, it’s time to set up access to the Mixmax API. Luckily, this is a straightforward process.
Get and test your API token
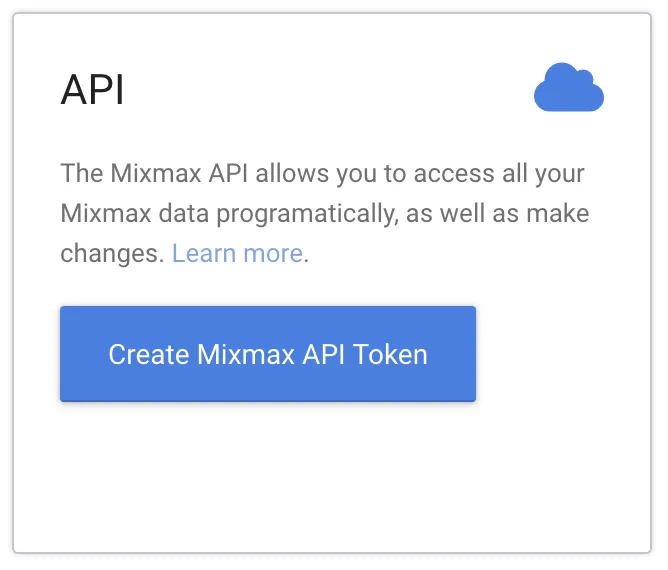
In the Mixmax dashboard, open up the Integrations settings page. Near the top of the page, you’ll see an “API” integration. This will allow you to generate your Mixmax API token, which is required in order to use the API. Click the “Create Mixmax API Token” button and copy the token shown to somewhere safe.
Now you’re ready to call the API. In a terminal, you can test it out with a simple curl command:
curl --header "X-API-Token: <your token>" https://api.mixmax.com/v1/users/meWith your token in place, that command will return your Mixmax user ID, something similar to:
{
  _id: "5e7140e9ce5935225b4999c2"
}
Now you’re all set to use the API. (Having trouble? Email us and we’ll gladly give you a hand!)
Test your onboarding sequence
In order to tell the Mixmax API which sequence to add people to, you’ll need its ID. You can find it in the URL while you’re editing the sequence; it looks similar to 52ee8b4b7df7362e9aea4c30. Copy this ID somewhere safe.

Let’s try adding a user to your sequence via curl. The API endpoint we’ll use is the POST /sequences/
Try this, with the appropriate values filled in:
curl -XPOST \
    --header 'Content-Type: application/json' \
    --header "X-API-Token: <your token>" \
    https://api.mixmax.com/v1/sequences/<your sequence ID>/recipients \
    -d '{ "recipients": [{ "email": "ryan@mixmax.com", }], }'
You should see a response like:
[
  {
    "email": "ryan@mixmax.com",
    "status": "success"
  }
]
This means you’ve successfully added me to your onboarding sequence. Our goal is to make your website signup system do this same thing automatically, so let’s get into the code.
Adding a user to your onboarding sequence in a Node web app
To accomplish this in a website powered by Node, you’ll need to do essentially the same thing that the curl command above does: send a request to the API with the email address of your new user. There are many possible approaches; we’ll talk through two of them: using a generic Node module for making HTTP requests and using the Mixmax SDK for Node.
Making the API request directly
I like the got module for making requests, which you can add to a Node project by running (for example):
npm install gotHere’s a simple example of using got to talk to the Mixmax API:
const got = require('got');

async function addUserToMixmaxOnboarding(email) {
  const onboardingSequenceId = '<your sequence ID>';
  await got(`https://api.mixmax.com/v1/sequences/${onboardingSequenceId}/recipients`, {
    method: 'POST',
    headers: {
      'X-API-Token': process.env.MIXMAX_API_TOKEN,
    },
    json: true,
    body: {
      recipients: [{ email }],
    },
  });
}
This code expects that you’ll be storing your Mixmax API token in the environment variable MIXMAX_API_TOKEN on the server where your code is running.
After a new user signs into your website, you’d call addUserToMixmaxOnboarding with their email address as the argument, and voilá, they’d be added to your onboarding sequence.
Using the Mixmax Node SDK
If you’d like your code to be even simpler, you could use one of our SDKs. For example, you could install the Node SDK by running
npm install mixmax-apiand then your code would look something like this:
const MixmaxAPI = require('mixmax-api');

async function addUserToMixmaxOnboarding(email) {
  const api = new MixmaxAPI(process.env.MIXMAX_API_TOKEN);
  const onboardingSequenceId = '<your sequence ID>';
  const sequence = api.sequences.sequence(onboardingSequenceId);
  await sequence.addRecipients([{ email }]);
}
Similar to above, you’d need to call this function at the location in your code where the user has signed up and you know their email address.
And we’re done!
Now that your web app is talking to the Mixmax API and putting your new users into sequences, you’ve got a great new way to automatically connect with those users as they begin to learn about what you can do for them.
If you have any questions about this blog post, or want to know more about using the Mixmax API to make your workflows easier and your products better, please feel free to reach out to us. We’ll be glad to help! And if you’re interested in joining the Mixmax team and making sales engagement software that makes peoples’ lives easier, check out our careers page.